
Showing posts with label LO2. Show all posts
Showing posts with label LO2. Show all posts
Tuesday, November 21, 2017

Monday, November 20, 2017
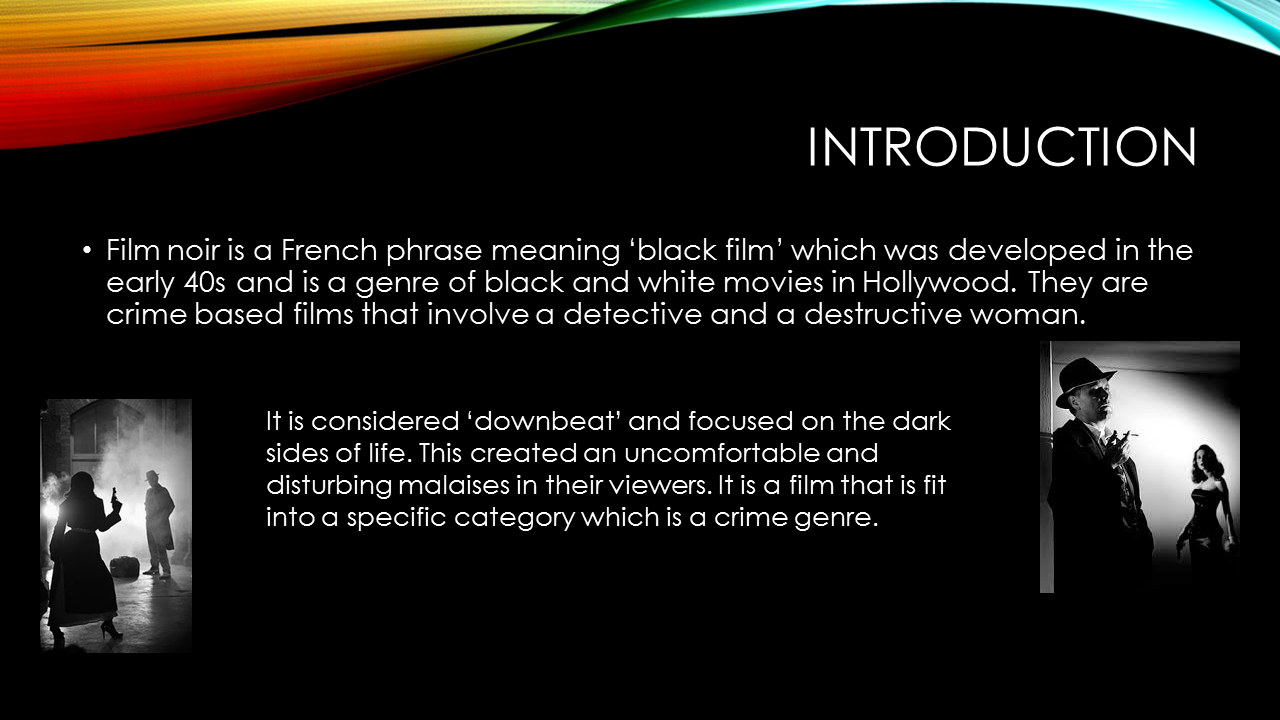
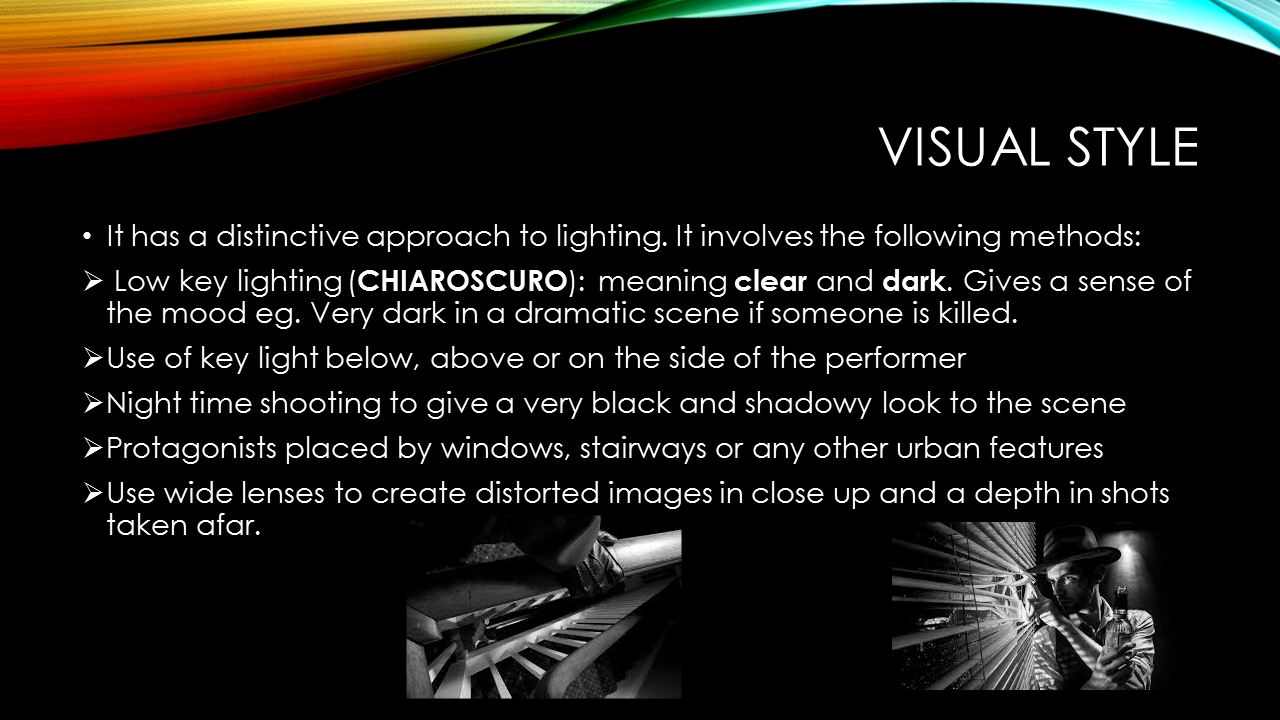
Sunday, November 19, 2017
Mood and Aesthetics
The studio lights created light spots which are very effective in making the image more dramatic and hides away the identity of the the person. The light is placed behind the subject and this is called backlighting which has an illuminating and glowing effect around the edges of them, creating a certain intensity. This was illustrated using artificial lighting. Chiaroscuro is a lighting effect created by a careful contrast of light and shadows. It is best exemplified in film noir productions
The images below are perfect example of Chiaroscuro lighting, indicating light and dark imagery. This lighting is also used in paintings displayed from George De La Tour - The Carpenter 1642 who portrayed artistic paintings with low key settings. I have recreated this painting similarly by displaying light in a dark setting. This created shadows and silhouettes.


Friday, November 17, 2017
Orientation and Perspective
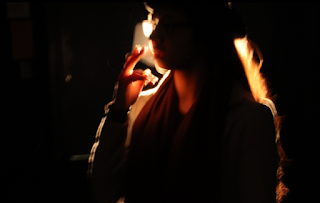
I had used the Canon DLSR camera to capture these chiaroscuro pictures using a studio light and a dimmer. I had used backlight where the light had created a starburst effect in a silhouette image where the light is placed behind the object or person. The shutter speed had created a blurred image outlining the person in a double effect. I have displayed a range of shadows and light to create depth
in the image that convey generic conventions of a Film Noir.
This was done in a black box studio so the redhead light could focus on the individual person and also so the location and atmosphere did not reveal. This makes the light used very cinematic and dramatic and makes the subject anonymous yet bold. Using this shot shot would make the audience very curious and to who the person is and what is there part in the scene.

This was done in a black box studio so the redhead light could focus on the individual person and also so the location and atmosphere did not reveal. This makes the light used very cinematic and dramatic and makes the subject anonymous yet bold. Using this shot shot would make the audience very curious and to who the person is and what is there part in the scene.

Thursday, November 16, 2017
Photography
 In Photography, the light used in the image is not always natural and can be changed by using different colour filters over the studio light or can use redheads to create a more dull and red image which would be used in a scene of a dark room where the producer does not want the audience to know the location they are in or symbolised danger. There several different colours to use or can even be used without the filters and can adjust the lighting by using a dimmer.

 The red head lights can also be adjusted by height as the stand pole can be risen according to what size you want or where you want the light to be focused on with the subject.
Blanket lights can also be used in photography which create square of parallel lines in the image. This is obviously not natural lighting but is used in certain scenes where they might want to be showing someone in a tanning bed or in a football stadium where you would see these lights used.
Wednesday, November 15, 2017
Film and Theatre Lighting
 In Film and Theatre they use equipment such as Par Cans, Light Panels and on-light cameras. Par Cans are used to use a multitude of different colours which make the atmosphere appear less natural and has a range of artificial light which makes its look quite disco. This is not the effect we want for our Film Noir and want to use more warm tons such as oranges, therefore will not be using it.
Light Panels makes the room look a lot lighter and focuses on a subject or an area in the space wherever it is placed. It produces too much light which kills the suspense we were aiming to create and so won't be using these either unless it is outside of the room and we do what to show bright lighting.

Tuesday, November 14, 2017
Television Set Up
 For Television Set up, we will use a box room that has four walls so we can only show two of them as we will place the camera on the other two walls of the room. This is because when filming, there is a 180 degree line that the actors cannot pass and this is die to the camera and lights being placed over the line.This is called Line of Action and is used for every production.
  In this picture on the right side, it illustrates where the actors are placed and where the cameras and lights are placed and this is what set up we will use for our Film Noir Cinematography. This separates anything getting in the way of a perfect shot cause as wires or poles from the equipment.
  Studio rigs are used above the room to make the quality of lighting better in the room, to light the scene. Some times natural lighting does not make the location look cinematic enough and improves the light angles as well. There are handles on it that allow you to hold it easier and get better angles of the production. This is a professional recording and lighting device.
Monday, November 13, 2017
Studio Set Up
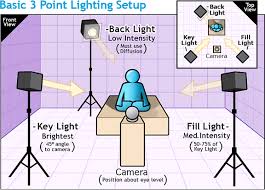
 I have learn how to to use three-point lighting to produce my Film Noir in the best cinematic lighting. Three-point lighting is back light, key light and fill light. These three studio lights affect the shadow and lighting on the subjects face such as rembrandt and split lighting and creates meaning through lighting. Back lighting produces low intensity and fill light mid intensity. The highest intensity of light is key lighting which is faced towards the subjects face.
 During my set up practice I had set out the Venetian blinds to see how I will film it during the real filming production and how it will be seen through a camera. The props I have used in my film noir scene is part of my studio set up and evidently portrays how to capture props using the Canon camera.

Me and my classmates had captured moments using three point lighting on a subject and how lighting had changed and structured of their face. This video displays how we had controlled light and how the angle of the light had changed the appearance of the subjects face. We see at 0:03 seconds that the studio light is placed on the left of the room and this created split lighting on his face, which revealed only half of his face in the closer lighting. At 0:11 seconds we see an exposure triangle in the subjects face which is defined through aperture, shutter speed and IOS settings.
Sunday, November 12, 2017
Direct & Indirect Sources
Lighting that is mixed from direct sources and indirect reflection. In daylighting this means that some part of the light of the sky or the sun is bounced off some surface, while at least part of the sky is still visible from the point. Direct Light flies straight from the light source to the subject. Sunlight on a clear day is direct light. Light from an on-camera flash
can also be direct light. While direct light has many uses,
photographers often prefer the softer look of diffused and reflected
light.

Indirect light can be bounced off, for example if there was a lake, the light would reflect off it and bounce which makes the image look softer and diffuses the light. It also helps to fill in any unwanted shadows that have appeared because of the natural light from the sun.
For this section we have explored lighting using studio light to create various lighting technique. Such as broad side, back light, side lighting, short side, Rembrandt light. In the first video we exported the different type of lighting. The first type of lighting we tried is broad side light which created a dark affect like the person had something to hide. We also went on to create Rembrandt lighting which creates a shadow triangle. This highlights the features of the subject and their natural features will be highlighted. There were also tasked to use the technique of three point lighting. This include three parts such as key lighting, fill light and back light and that is what we have been tasked with the video. In both of the videos we have used artificial sources of light.
In the second video we had two studio lights that were used to create different lighting technique. In this we first had one subject exploring the different types of lighting. In the beginning we used on of the studio lights to create side light which created an effect that the subject a dark side to them. We also went onto Rembrandt lighting (0.14) which was created with on source of light with had created a triangle on the right side of the subjects face. We then attempted rim lighting (0.17) but then it happen to become side light. We then adjusted the studio light (0.20) and put the light directly behind the subject which then had a good outcome because it created a silhouette affect which completing shaded the subject face.
We then went onto create a scenario of a interrogation scene with two subject at the end of the table. In this we used two studio lights to have two light sources so we can have the same amount of light on the subjects faces to show that they are equals. We then went onto a different subject and explored the different lighting. At 0.49 we created a side light affect to show that the subject has two sides to their personality and the mystery behind them. We then went onto another interrogation scene but this time we used one source of light to create a darker affect and the one light source will show the person that is getting interrogated at 1.24. In this task we used two light sources they were both studio lights. We used this to recreate different types of lighting techniques. In this video we used the three point lighting effectively because we had the studio lights in the correct positions and we added the extra studio light.

Indirect light can be bounced off, for example if there was a lake, the light would reflect off it and bounce which makes the image look softer and diffuses the light. It also helps to fill in any unwanted shadows that have appeared because of the natural light from the sun.
Sources of light
Studio set up and direct/indirect sources
For this section we have explored lighting using studio light to create various lighting technique. Such as broad side, back light, side lighting, short side, Rembrandt light. In the first video we exported the different type of lighting. The first type of lighting we tried is broad side light which created a dark affect like the person had something to hide. We also went on to create Rembrandt lighting which creates a shadow triangle. This highlights the features of the subject and their natural features will be highlighted. There were also tasked to use the technique of three point lighting. This include three parts such as key lighting, fill light and back light and that is what we have been tasked with the video. In both of the videos we have used artificial sources of light.
In the second video we had two studio lights that were used to create different lighting technique. In this we first had one subject exploring the different types of lighting. In the beginning we used on of the studio lights to create side light which created an effect that the subject a dark side to them. We also went onto Rembrandt lighting (0.14) which was created with on source of light with had created a triangle on the right side of the subjects face. We then attempted rim lighting (0.17) but then it happen to become side light. We then adjusted the studio light (0.20) and put the light directly behind the subject which then had a good outcome because it created a silhouette affect which completing shaded the subject face.
We then went onto create a scenario of a interrogation scene with two subject at the end of the table. In this we used two studio lights to have two light sources so we can have the same amount of light on the subjects faces to show that they are equals. We then went onto a different subject and explored the different lighting. At 0.49 we created a side light affect to show that the subject has two sides to their personality and the mystery behind them. We then went onto another interrogation scene but this time we used one source of light to create a darker affect and the one light source will show the person that is getting interrogated at 1.24. In this task we used two light sources they were both studio lights. We used this to recreate different types of lighting techniques. In this video we used the three point lighting effectively because we had the studio lights in the correct positions and we added the extra studio light.
Subscribe to:
Posts (Atom)